Import is a powerful tool that allows you to create and/or modify your projects within the Tabsters tool, using an Excel file standardized for the tool's nomenclature. By defining the different columns you wish to be filled in Tabsters, the different elementsproject portfolio, Project, Action...) and the hierarchy that may exist between them, you can obtain a ready-to-use project in your Tabsters environment.
There are 3 different types of import in Tabsters, which you can discover below.
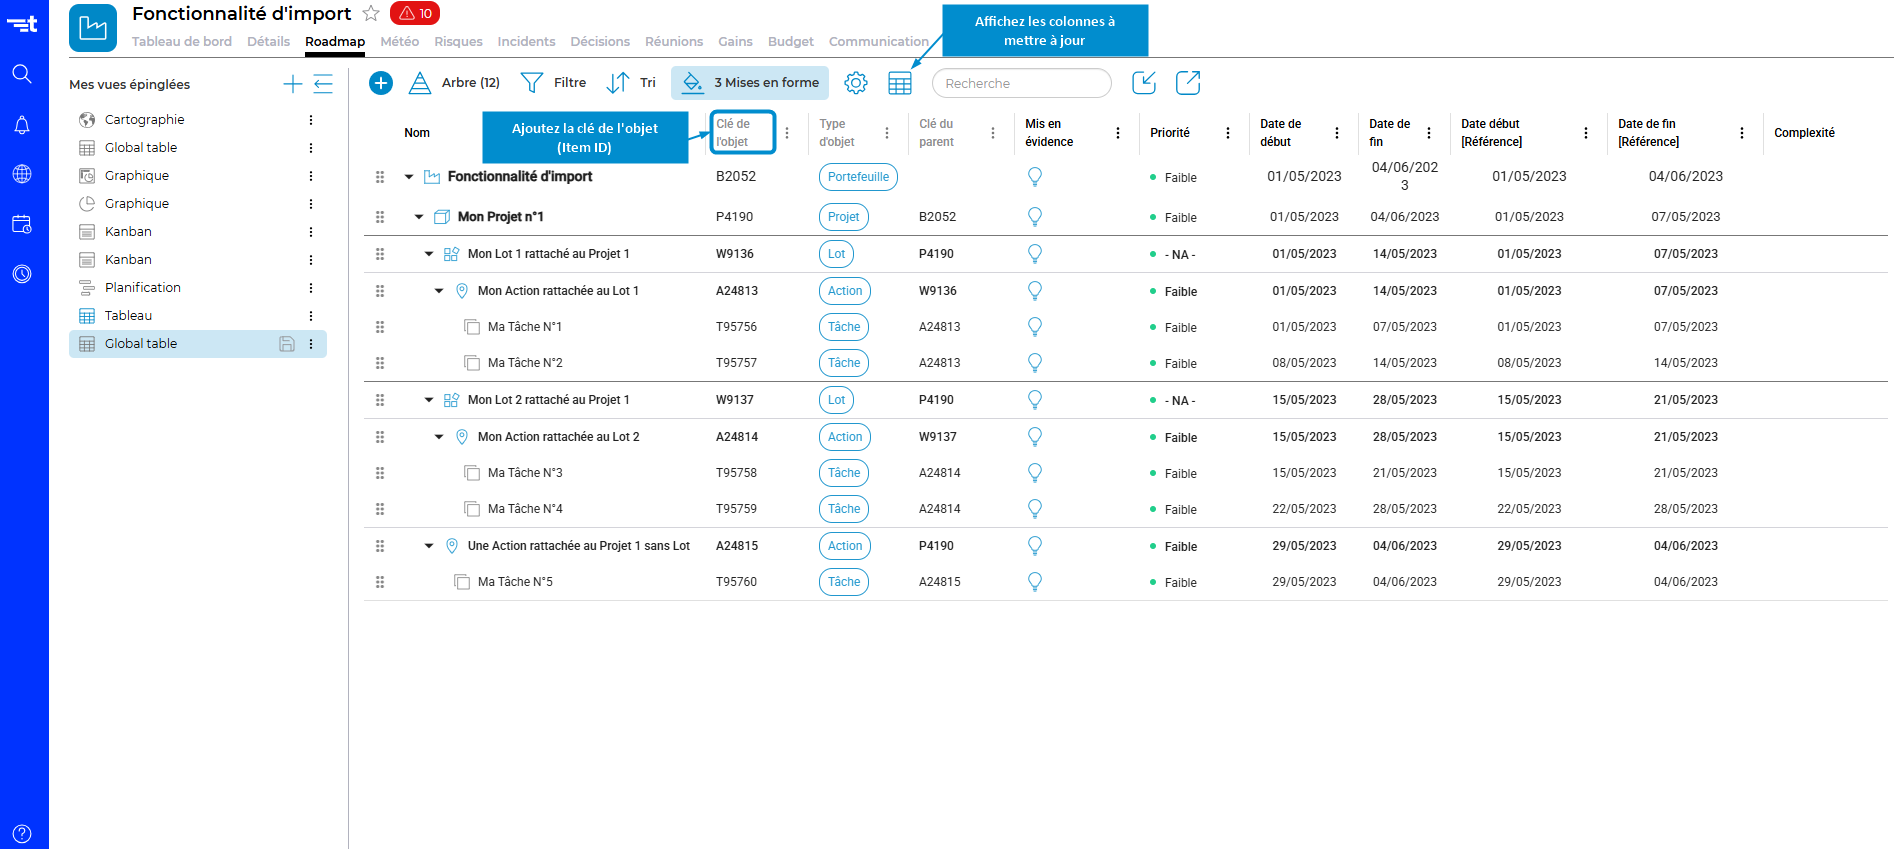
To ensure the success of this type of import, you must add the column "Object key / Item ID" to your import Excel file . This information is essential for Tabsters, as it will enable the tool to know which item is affected by the modification you are making.
Please note: Shaded columns cannot be modified. You can therefore export them, but they will not be imported.

Update your Excel file with the changes you wish to see on Tabsters
ATTENTION: Remember to delete the line of the current element (the project portfolio in our case), otherwise your import won't work.


If you have saved, your file should be in your Downloads folder.

Once you've selected your file, a mapping pop-up will appear. Check that your columns correspond to Tabsters and click on :


Once validation is complete, a pre-validation table will appear, with 4 informative columns and a preview of your imported data.
ATTENTION: If Warning or Error information is displayed, then do not validate and correct the problem before re-performing your import.

Once your import has been carried out correctly, the result will be visible to all users.

Import in creation lets you create your projects with your various data in Tabsters, from your Excel file.
There are 2 types of creative import:
If you're importing directly from the parent level where you wish to have your elements ( project portfolio level if you're creating projects, project level if you're creating batches, etc.), you don't need to add any additional columns, as Tabsters will, by default, create any element with no additional information as a child of level N where you're importing.
On the other hand, if you wish to import several elements which are not direct children of the level you're at (batches, actions or tasks from the project portfolio level, for example), you must fill in the "parent ID " and "Item type" columns .
Without these columns, your import will not be created correctly.
From your Excel file, list the items you wish to import into Tabsters

For example: A list of projects with start and end dates


A mapping pop-up will then appear.
If the column names you've entered match the Tabsters nomenclature, you'll be offered automatic mapping; otherwise, the relevant row will appear in red, and you can manually map your columns to match those in Tabsters by clicking on the little arrow next to its name.
Please note: if a column is not to be imported, set the value for this column to "-NA-".

Once validation has been completed, a pre-validation table consisting of 4 informative columns and a preview of your imported data will appear.
WARNING: If a Warning or Error message is displayed, do not validate and correct the problem before importing again.

Once your import has been carried out correctly, the result will be visible to all users.

Import into creation with hierarchy lets you create multi-level projects (Project, workpackage, Action, Task...) in Tabsters from your Excel file.
For this type of import, you must fill in the "Item ID / Clé de l'objet", "parent ID / parent ID" and "Item type / Type d'objet" columns in your Excel file .
This information will enable Tabsters to recognize the hierarchy you want to implement in Tabsters, as well as the different levels of elements you are importing.
Be careful , however, not to reuse the Tabsters nomenclature for the "Item ID" and "parent ID " columns, otherwise Tabsters will understand that you are trying to import modifications for elements already existing in the application. You could therefore inadvertently overwrite data from your projects.
From Excel, create your structure in your file and fill in the required data.
ATTENTION: For each of the lines you are going to create in your file, you will need :

Import your file at the desired location by clicking on the icon
Then click on the "Choose .xlsx file" button
A mapping pop-up will then appear.
If the column names you have entered correspond to the Tabsters nomenclature, then an automatic mapping will be proposed.
If not, the line concerned will appear in red and you can manually map your columns to match those in Tabsters by clicking on the small arrow next to its name.
Please note: if a column is not to be imported, set the value for this column to "-NA-".

Once you have validated, a pre-validation table with 4 informative columns and a preview of your imported data will appear.
WARNING: If a Warning or Error message appears, please do not validate and correct the problem before importing again.

Once your import has been carried out correctly, the result will be visible to all users.


